Release 7.0
brix:papilio Version 7.0
Intro
Today's release of brix:papilio 7.0 once again fulfills many customer requests and delivers further optimizations.
1. Features for all Users
1.1 User Interface
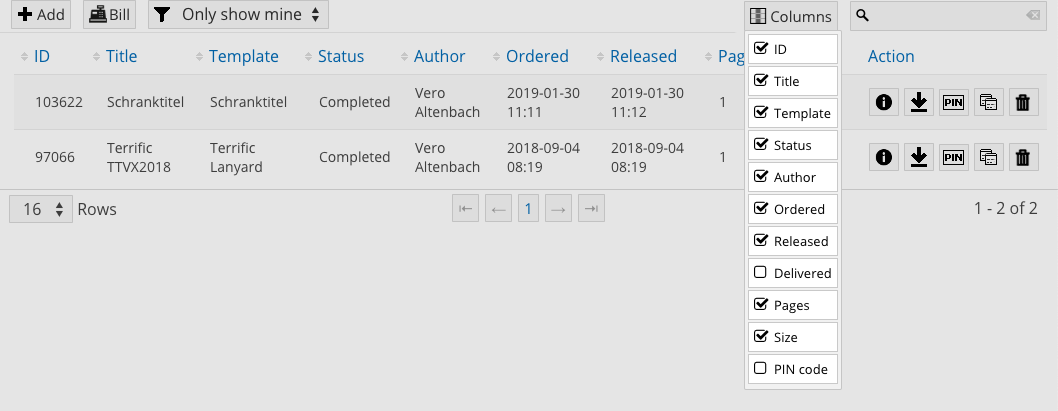
Additional columns containing order information can now be selected in the list of orders.
1.2 Extended layout options
1.2.1 Post Rendering
During the ordering process, the user can select a custom post rendering option.
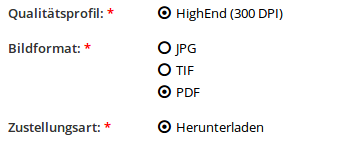
1.2.2 Output Format
The user can now choose the desired output format (if enabled on the template)
1.3 Further Application Optimizations
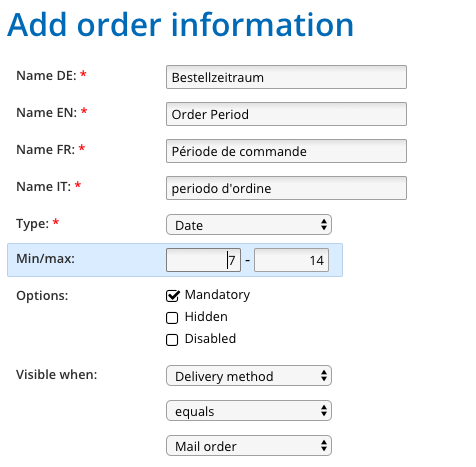
1.3.1 Setting a minimum and maximum date for the ordering period
In the template menu under order information, you are able to add a minimum or maximum of days (relative to the time when the order is placed).
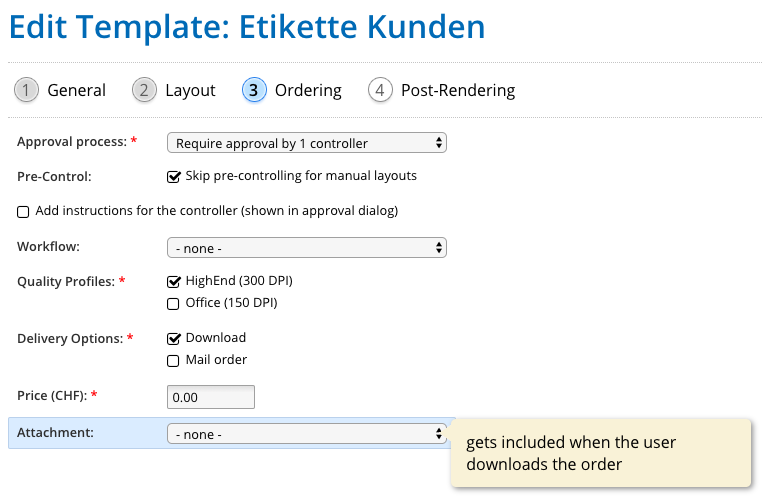
1.3.2 Add an attachment for order downloads
An attachment with additional information about the template can be configured, which is then delivered during the download process in addition to the output file.
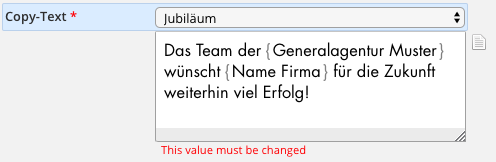
1.3.3 Partial Editability
The editability of text values can now be controlled on word-by-word basis instead of just globally. When in this mode, only words within curly braces can be edited by the user, while the rest of the text remains protected.
2. Features for Layouter / Graphic Designer
2.1 Menu Items
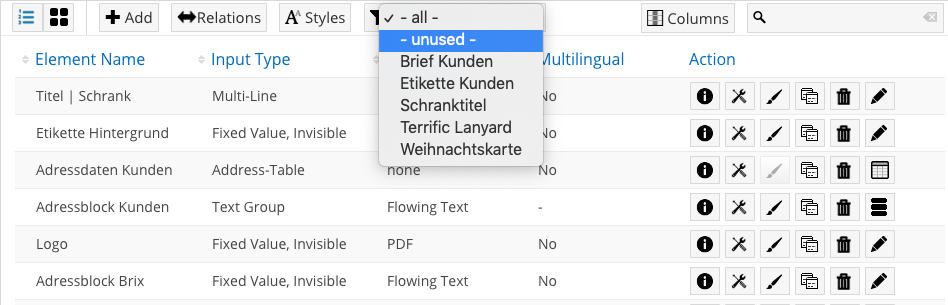
2.1.1 New Filter «unused»
It is now possible to display unused elements using the "unused" filter. This helps cleaning out orphaned elements that are not used anymore and might as well be deleted.
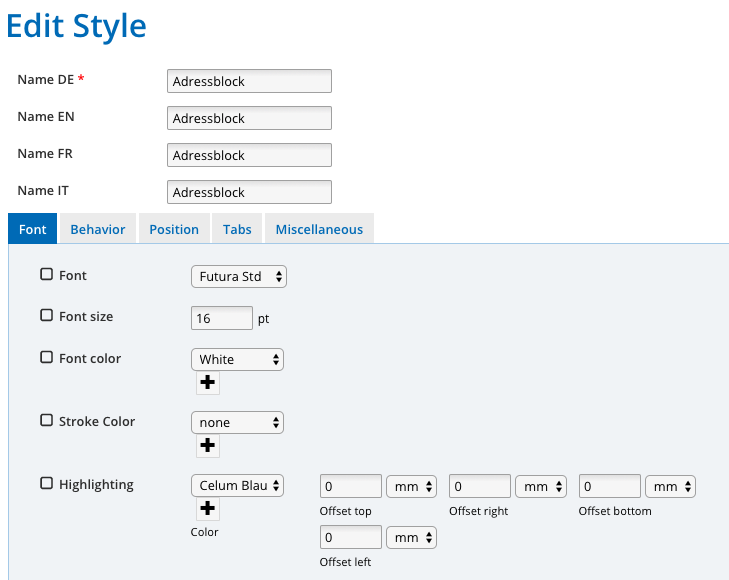
2.1.2 Edit text style in user interface
The design possibilities of the text style are split into user-friendly tabs with the corresponding settings.

2.2 Text style editing
2.2.1 Text style editing — Line color
In the font tab of the text style editor, the line color can be configured independently of the main font color.
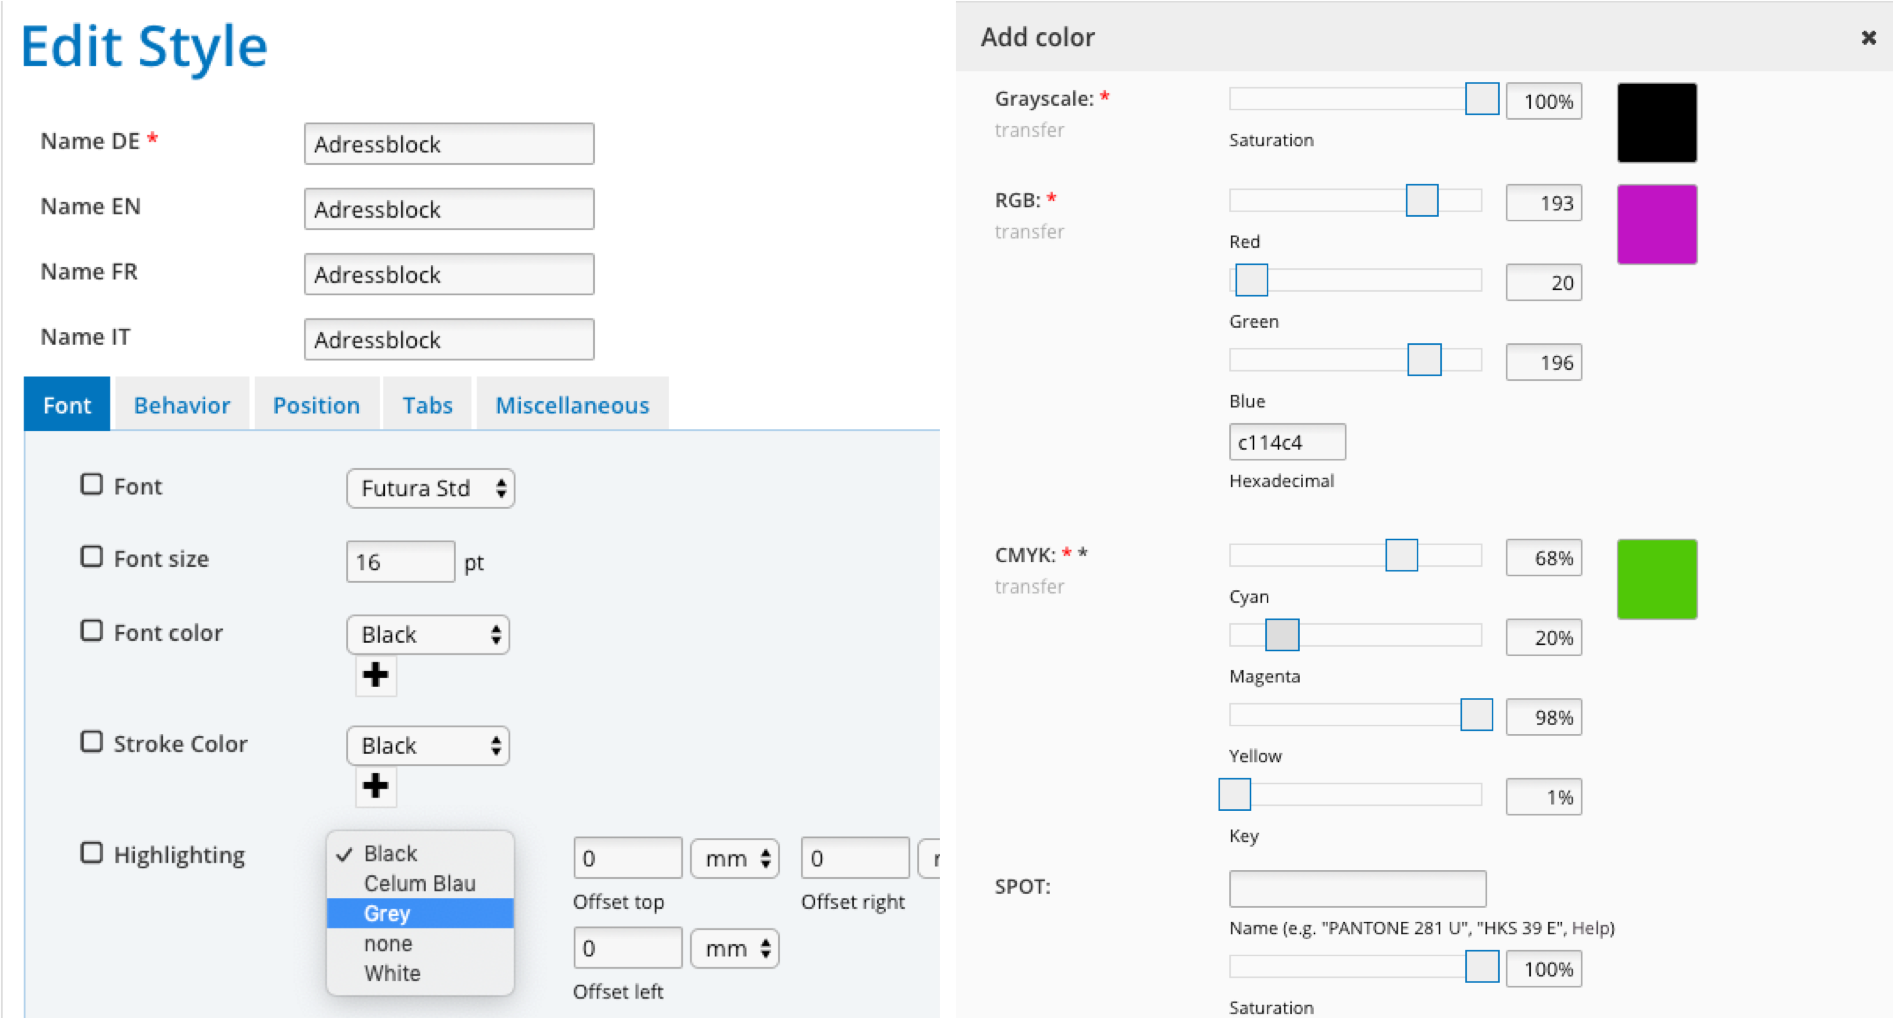
2.2.2 Text style editing — Text highlight color
Under the font tab of the text style editor, a text highlighting color can be configured, as well as its offset relative to the baseline.
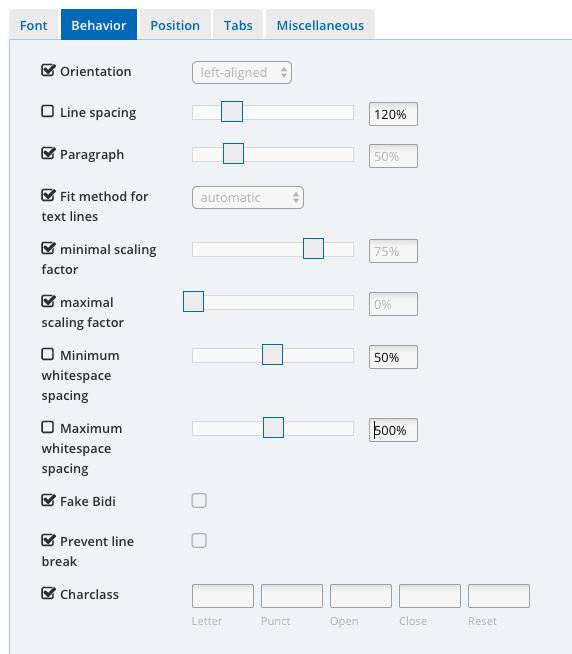
2.2.3 Text style editing — Whitespace spacing
Under the register behaviour in the text style editor, the minimum and maximum whitespace spacing can now be configured.
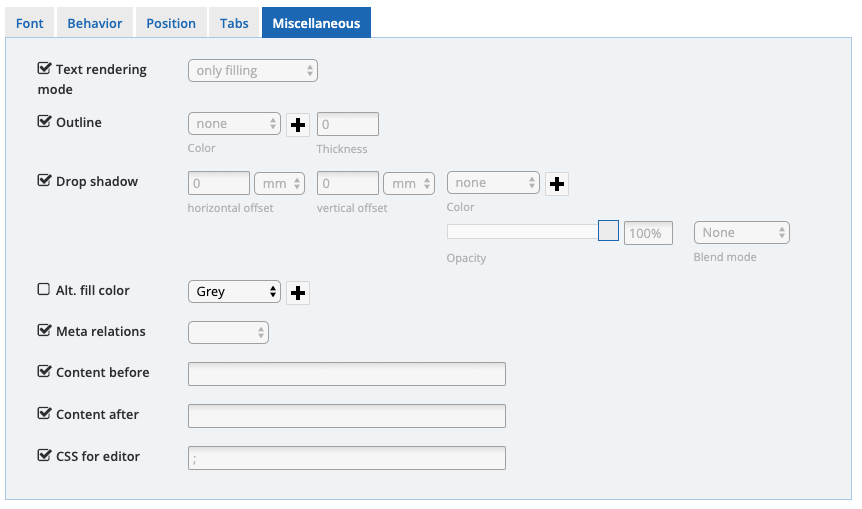
2.2.4 Text style editing — Fill colors
An alternative fill color for marking text can be set under the miscellaneous tab of the text style editor. This is intended to be used together with style relations.
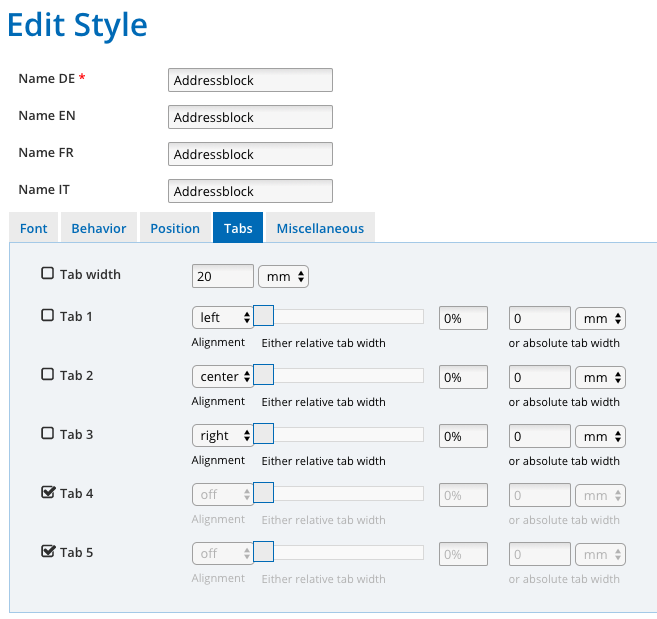
2.2.5 Text style editing — Tabs
The alignment of the text can now be set to left, centre or right under the Tabs tab in the text style editor. Up to 5 tabs can be configured this way, allowing you to create basic tabular layouts.
2.3 Element style editing
2.3.1 Element style editing — Rendering option for empty text elements
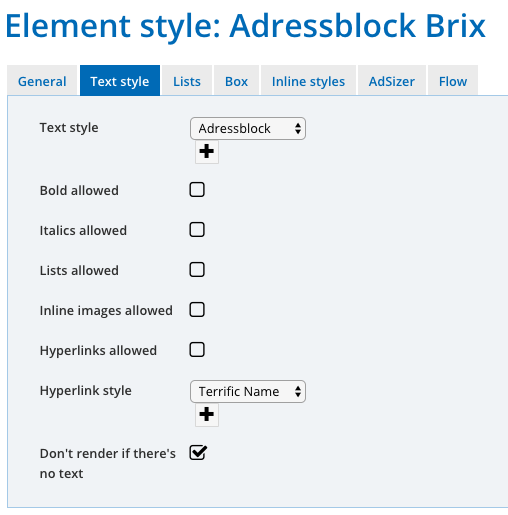
With this option, empty text elements can be excluded from rendering under the text style tab. This is the same behaviour that you already know from text groups, but now on an element level.
2.3.2 Element style editing — Scale Minimum Font Size
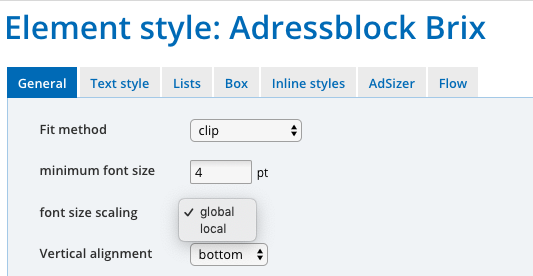
The scaling of the minimum font size can be set to global or local under the tab general. The new "local" behaviour scales the font size independently from the surrounding font sizes, where as "global" would have shrunken the font sizes in lockstep.
2.3.3 Element style editing — Blend mode for background color
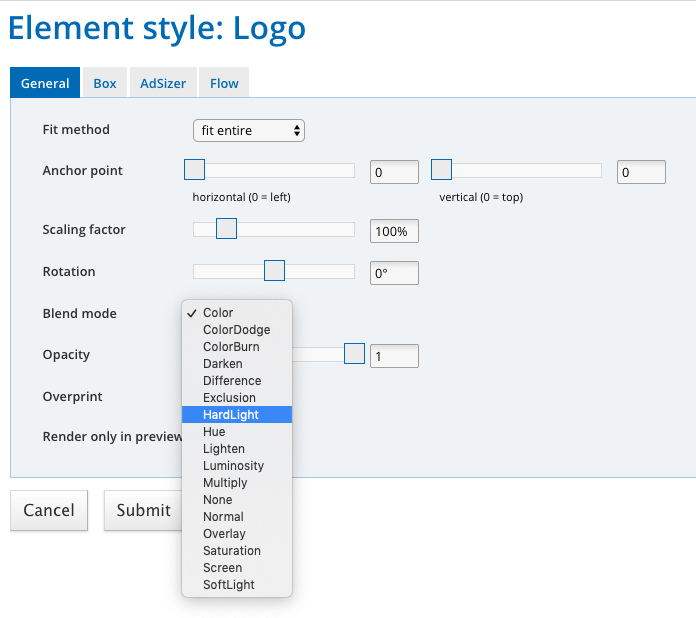
Under the tab general you can now set the blend mode for the background color of the element.
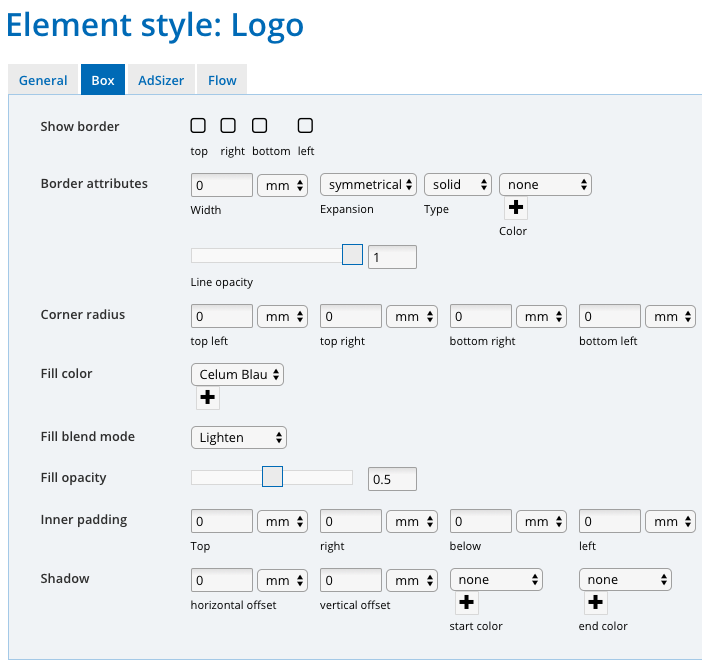
2.3.4 Element style editing — Opacity
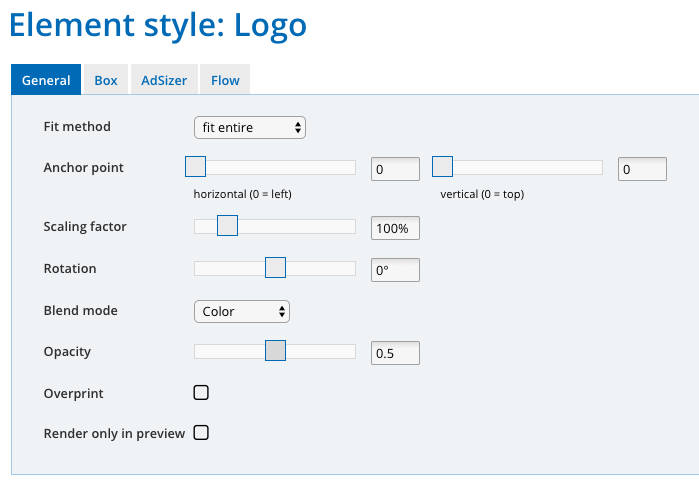
Under the tabs general and box, the opacity of the element or the fill color can be set.
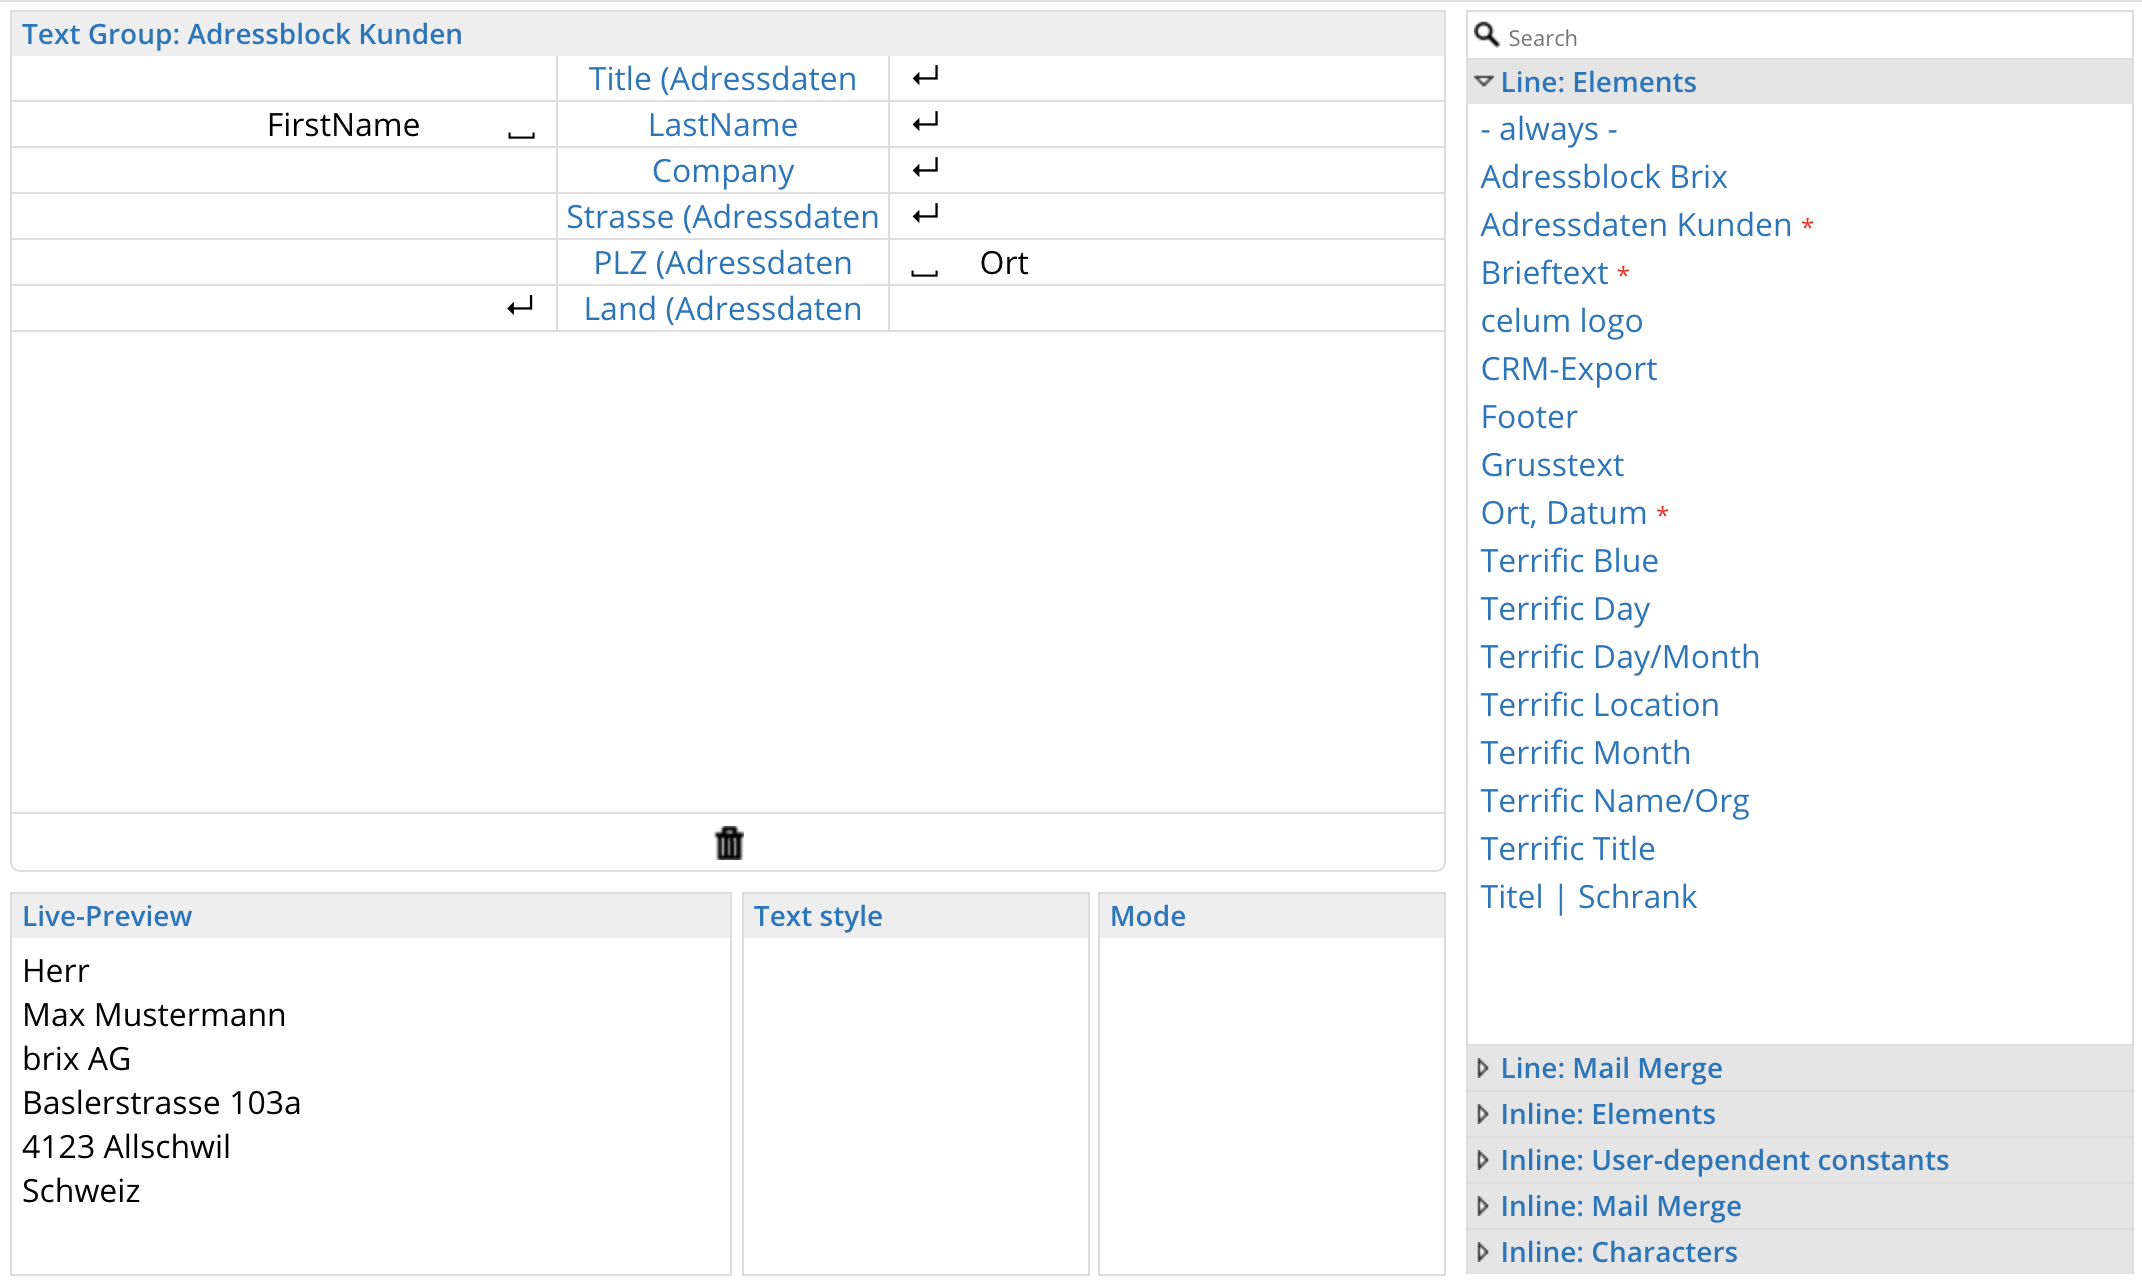
2.3.5 Text group editing
A wider range of inline elements are now available in the text group editing.
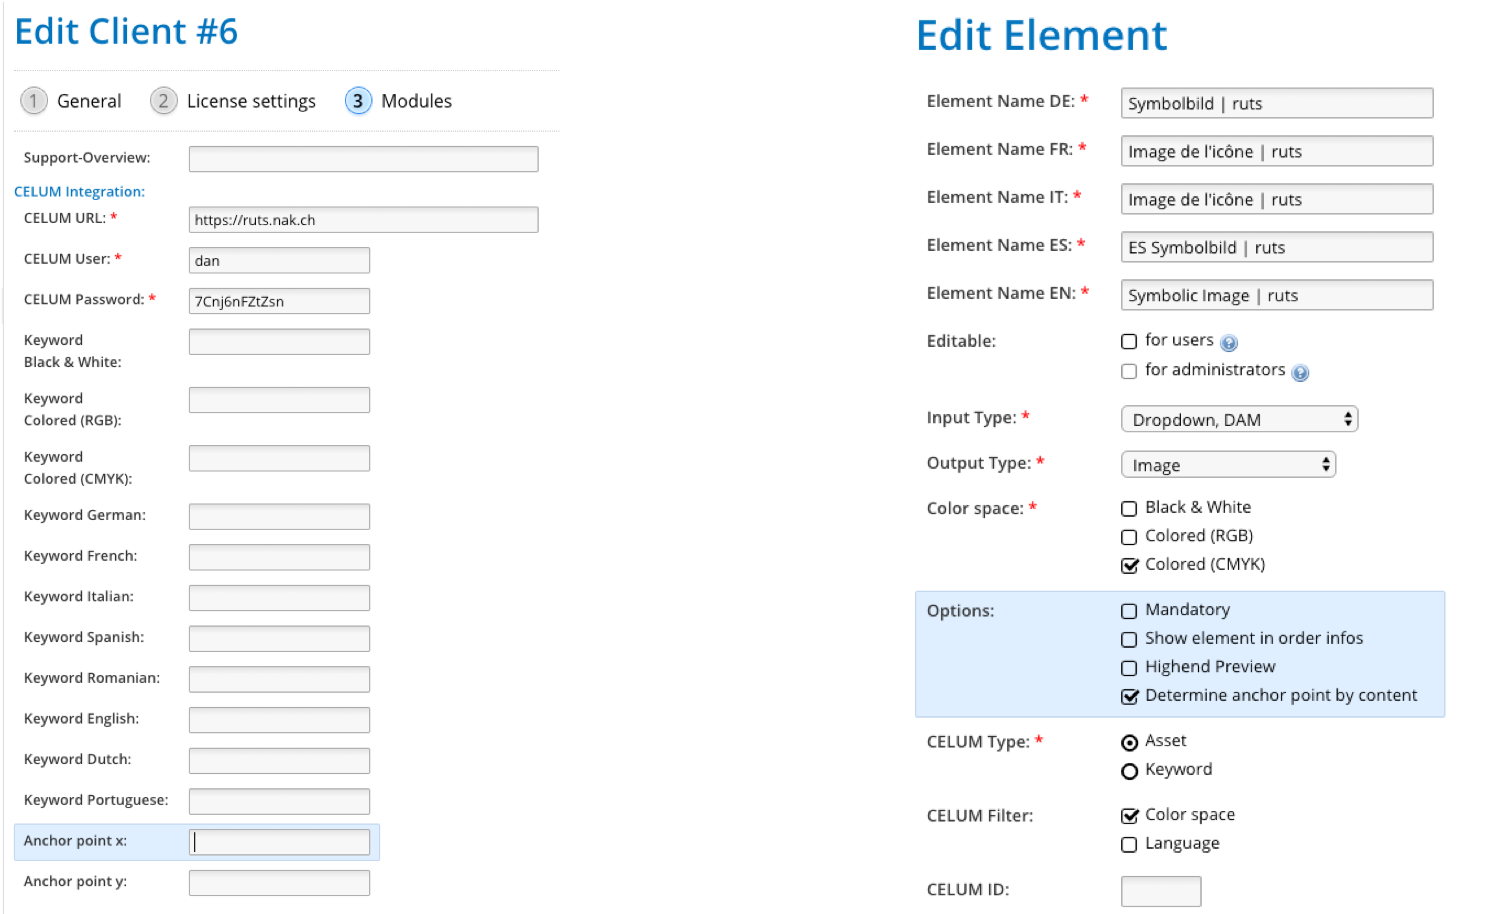
2.3.6 DAM element settings
It is now possible to configure which order properties will be applied as a general filter of DAM elements, whereas before, the color filter would always have been applied. Additionally, you can now also filter by the current language of the order.

2.4 Templates
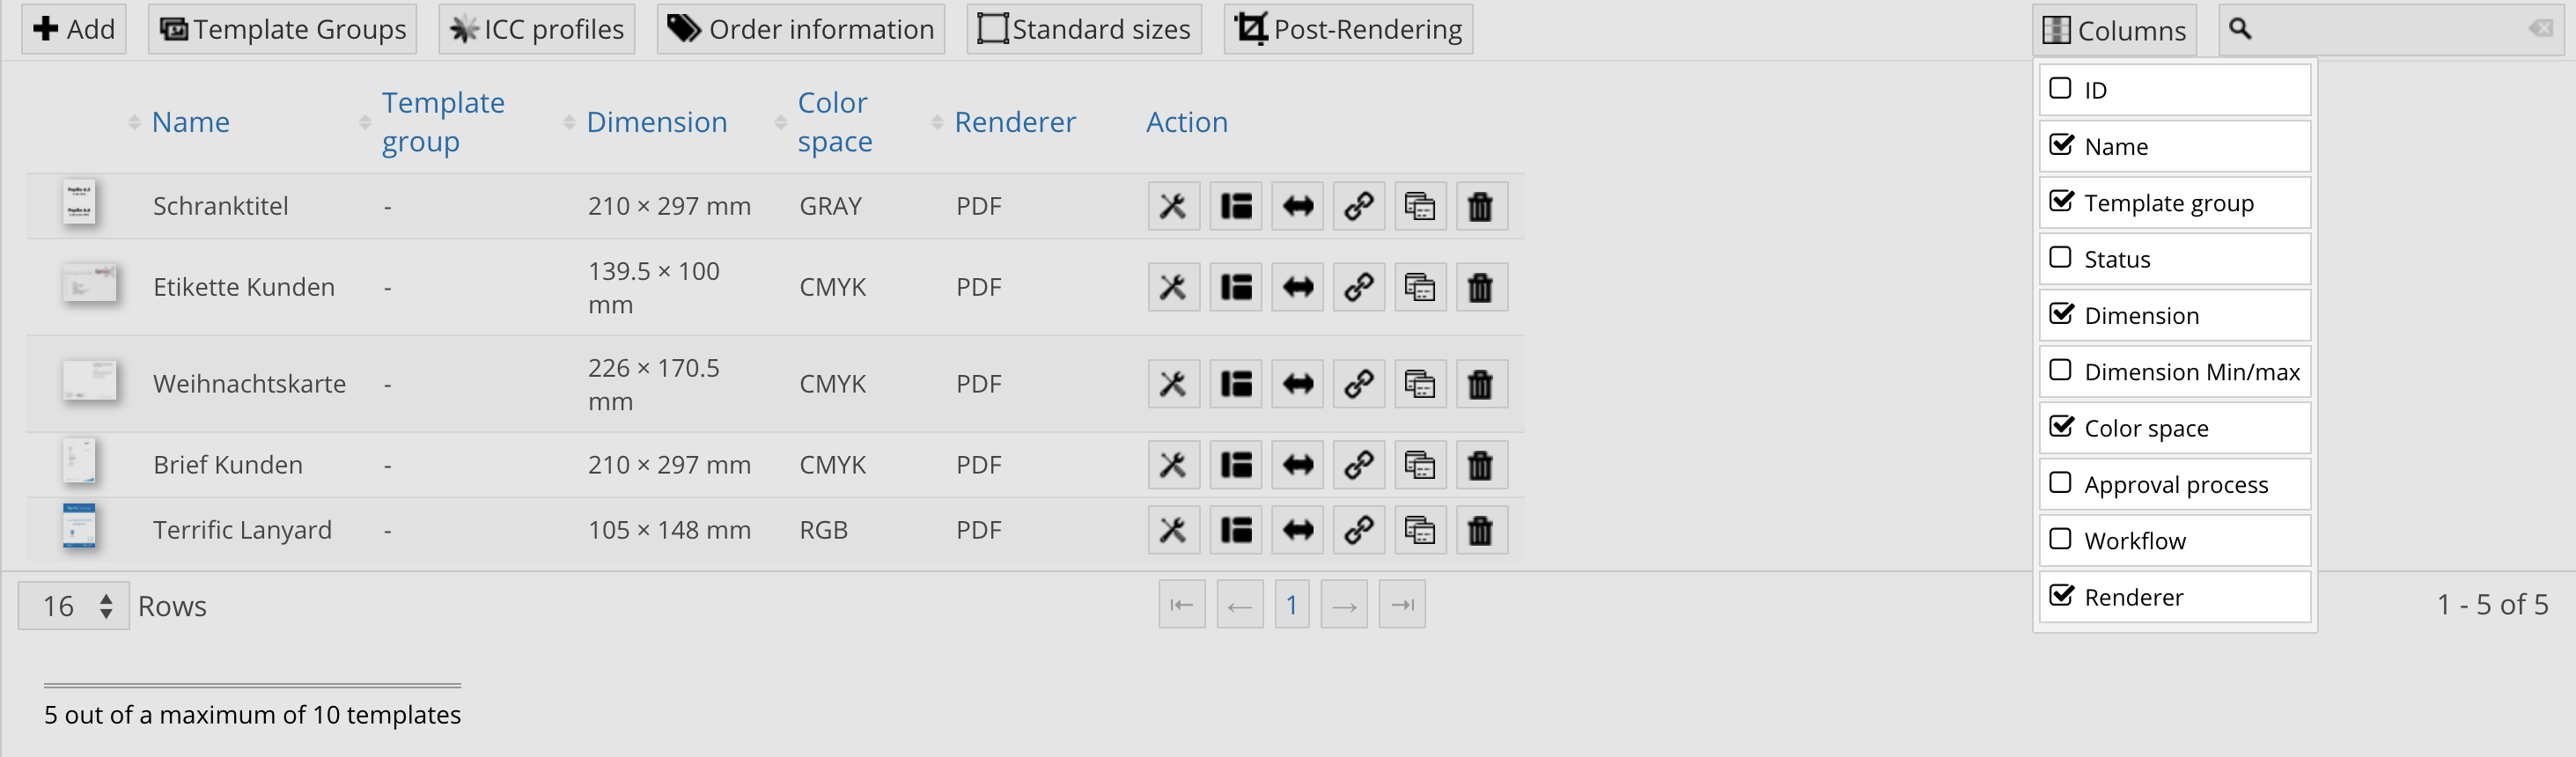
2.4.1 Improved presentation of the template list
The template list is now arranged more cleanly. The columns to be displayed can be configured.
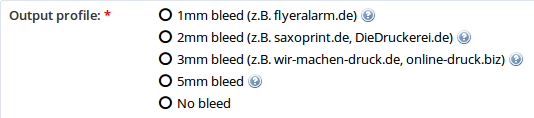
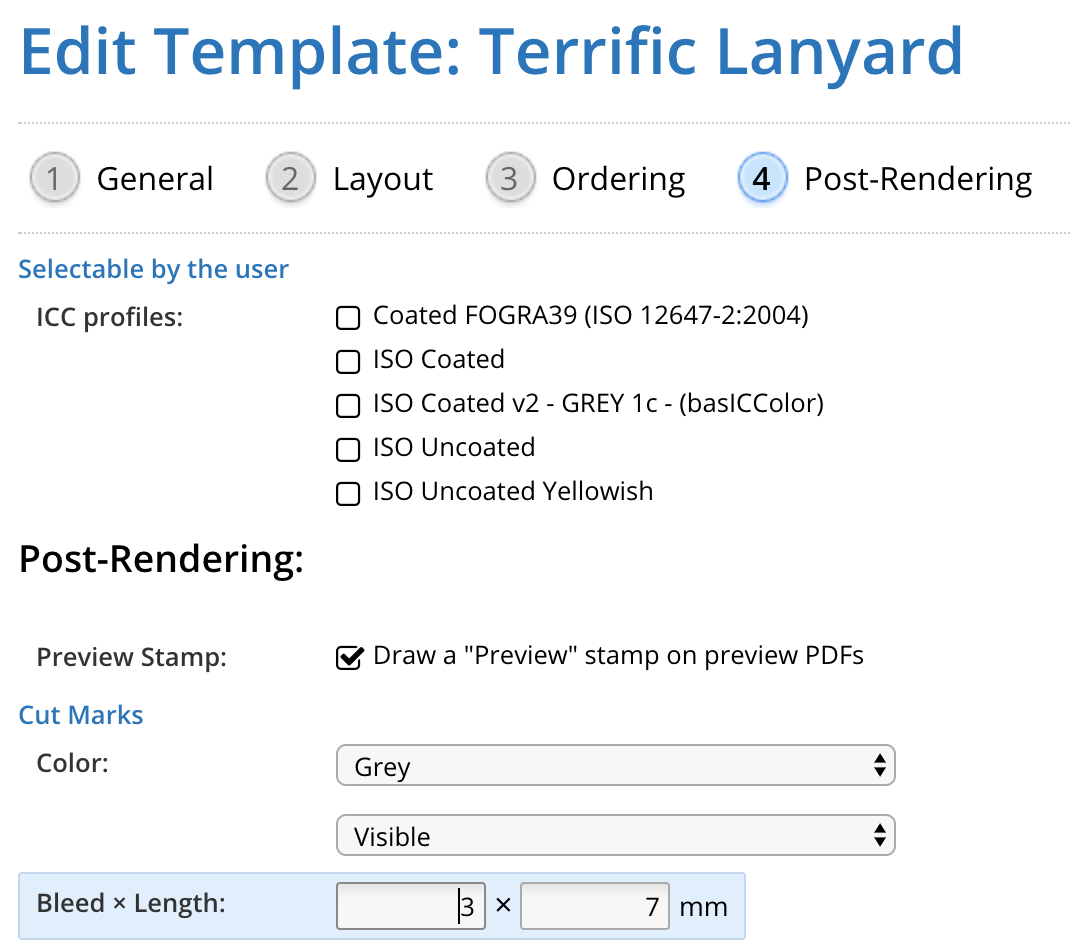
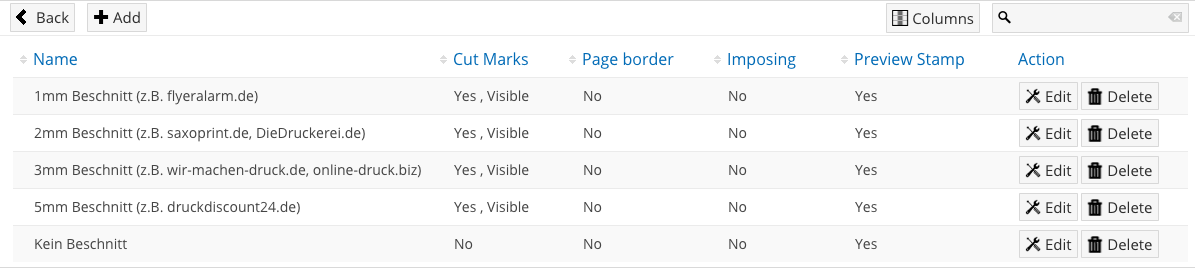
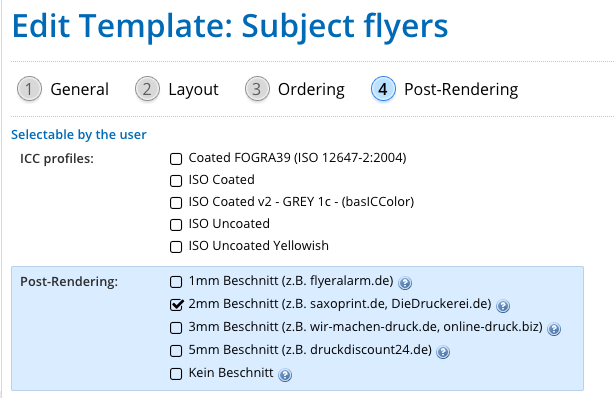
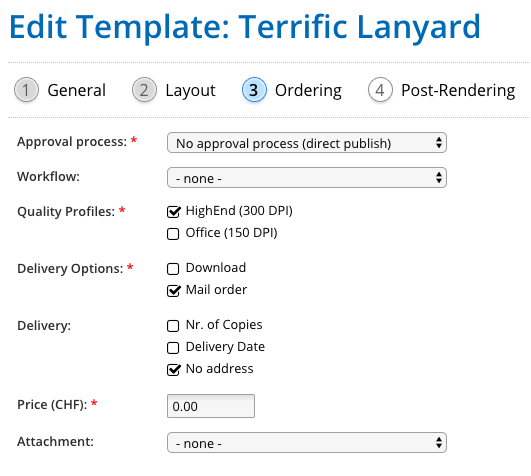
2.4.2 Setting the printing and cutting marks
In the template editing mode, under step 4 post-rendering, you can configure the length of the bleed and the cut marks per template or order, or even let the user decide what profile should be used.
2.5 Set Focal Point
The new focal point feature allows you to override the global anchor point, so that the important part of an image never gets sliced by the fit method. This is available both for DAM (through the focal point setter extension) and for regular images.
2.6 Configuring the Render Profiles
The layouter is now able to create their own render profiles, which can then be made available in different templates (see above).
3. Features for Administrators
3.1. Name and Title — New Menu
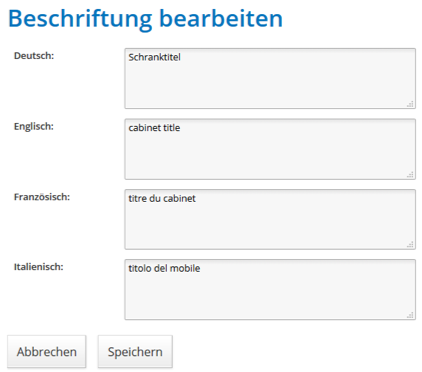
In the new "Name and Title" menu, all labels are clearly listed in the defined languages. The desired languages can be shown and hidden for faster display. This is especially helpful if you add another language later on.
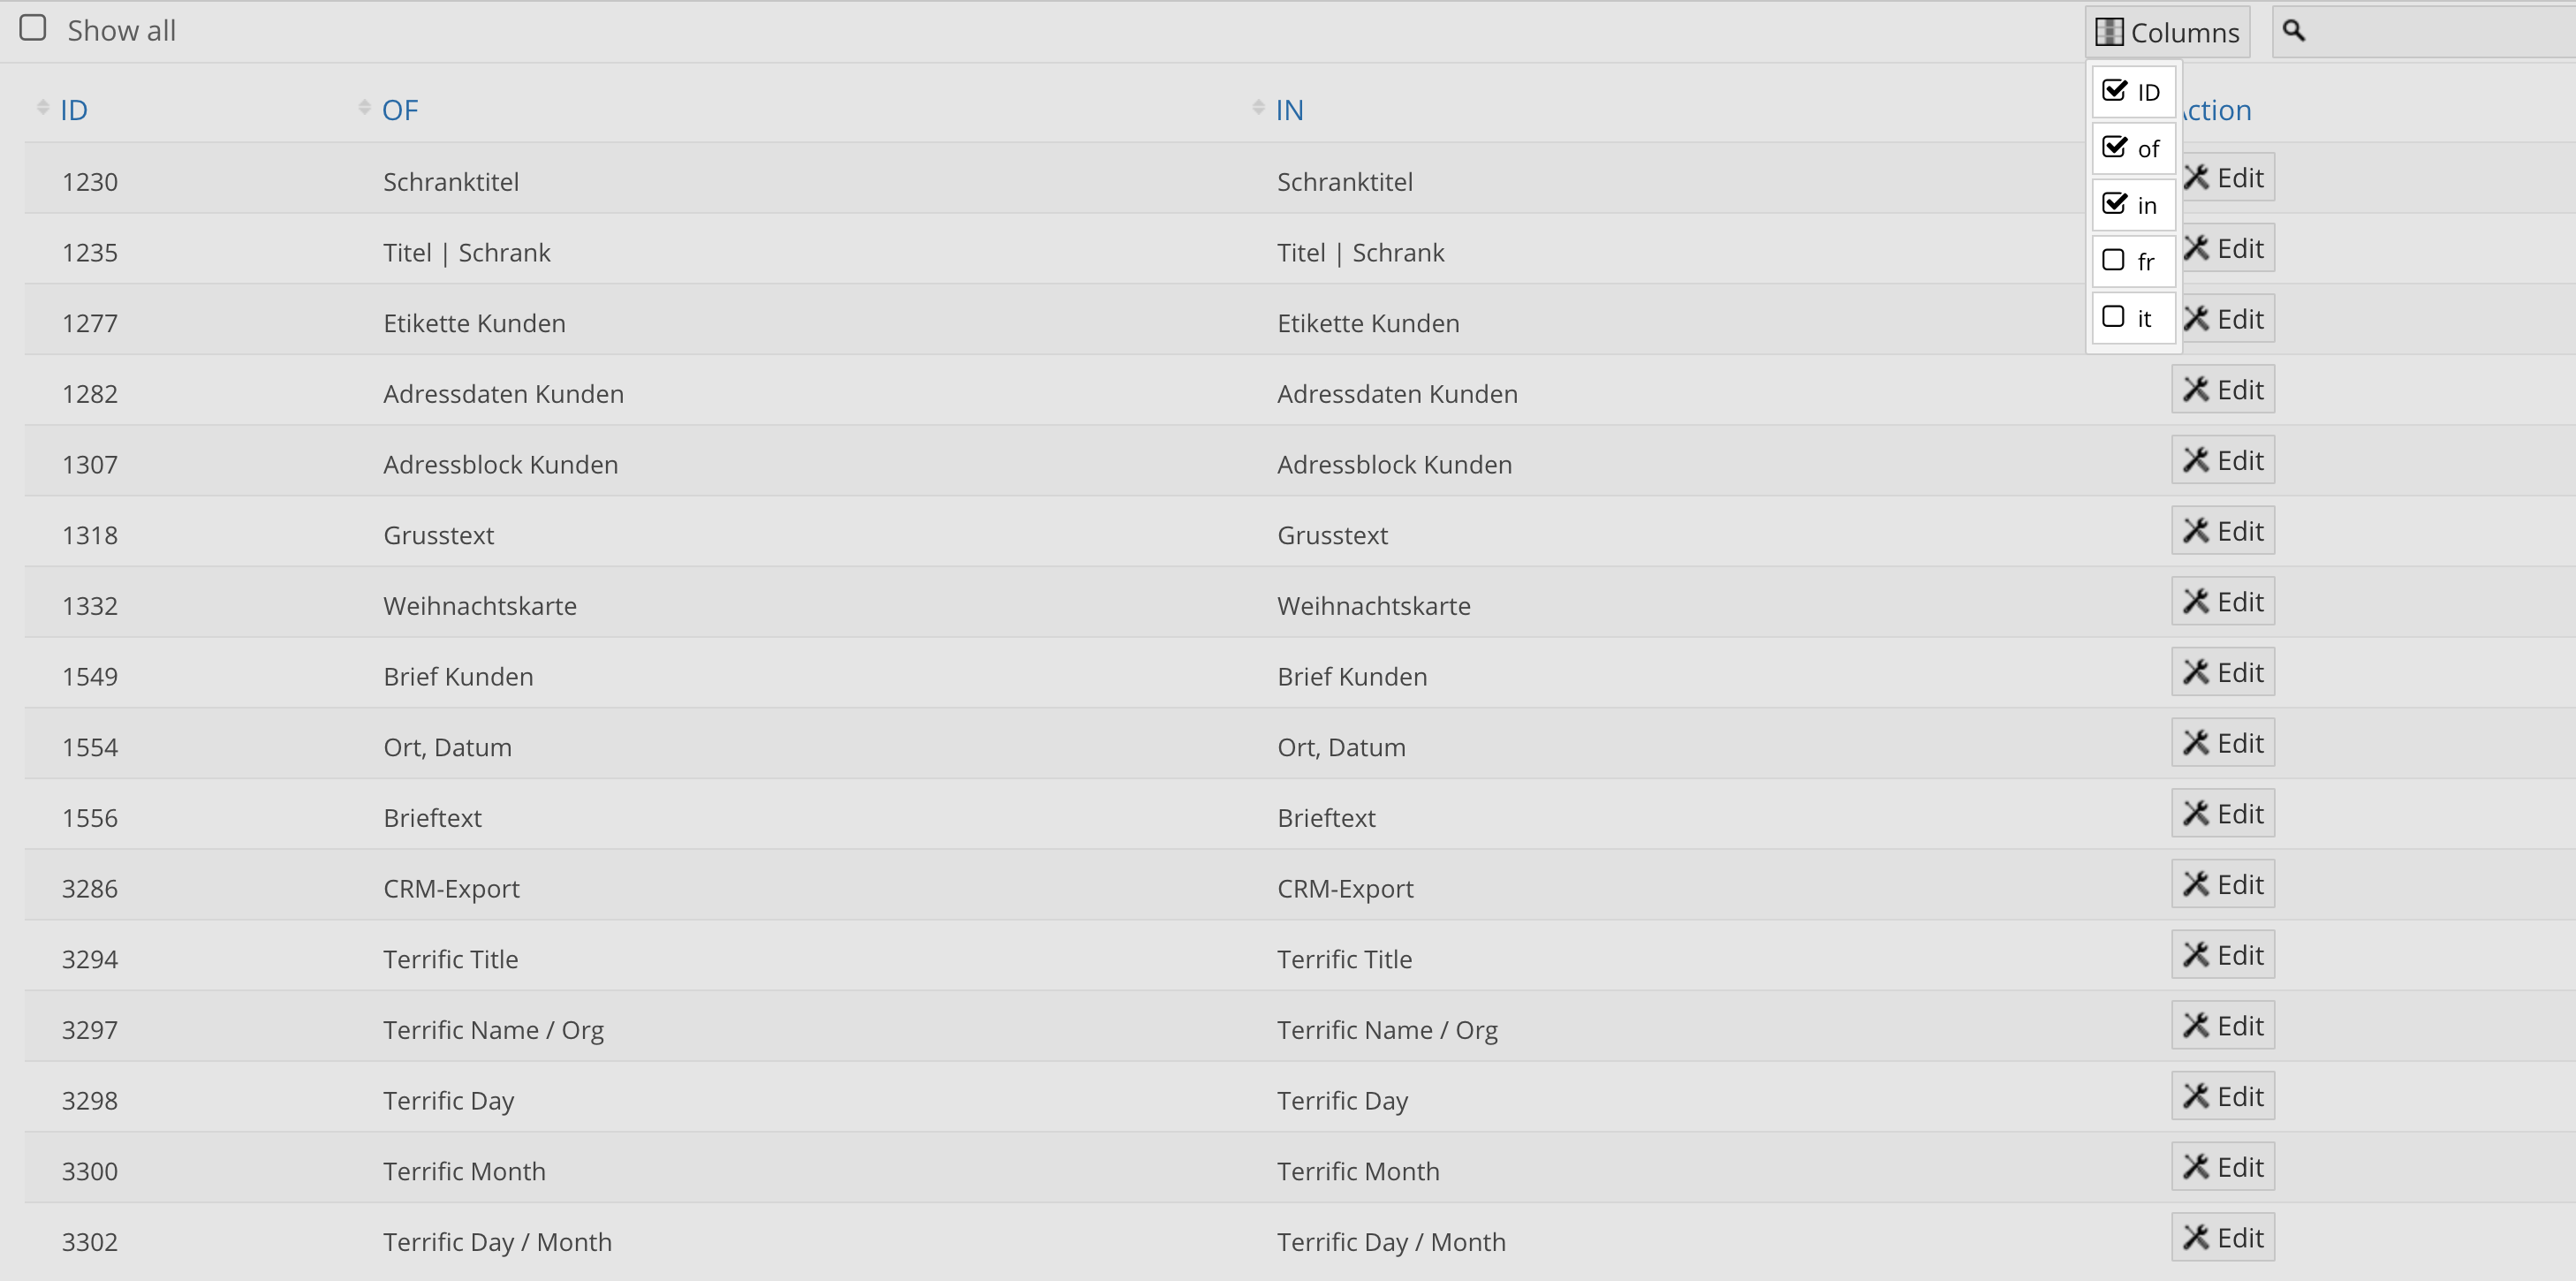
The values can either be edited directly in the table, or you can use the edit button to bring up the usual multilingual text editing window.
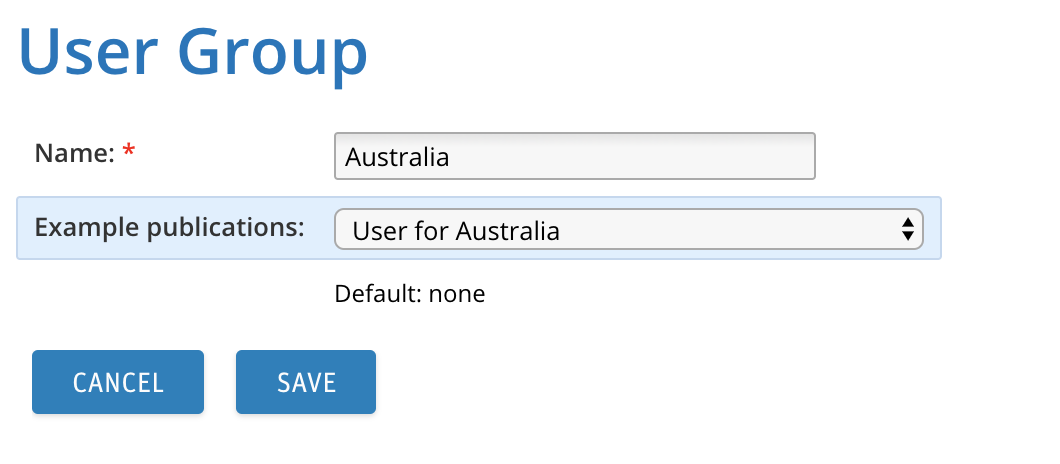
3.2 Menu: Groups
The user group interface has been completely rewritten to be more readable and user-friendly.
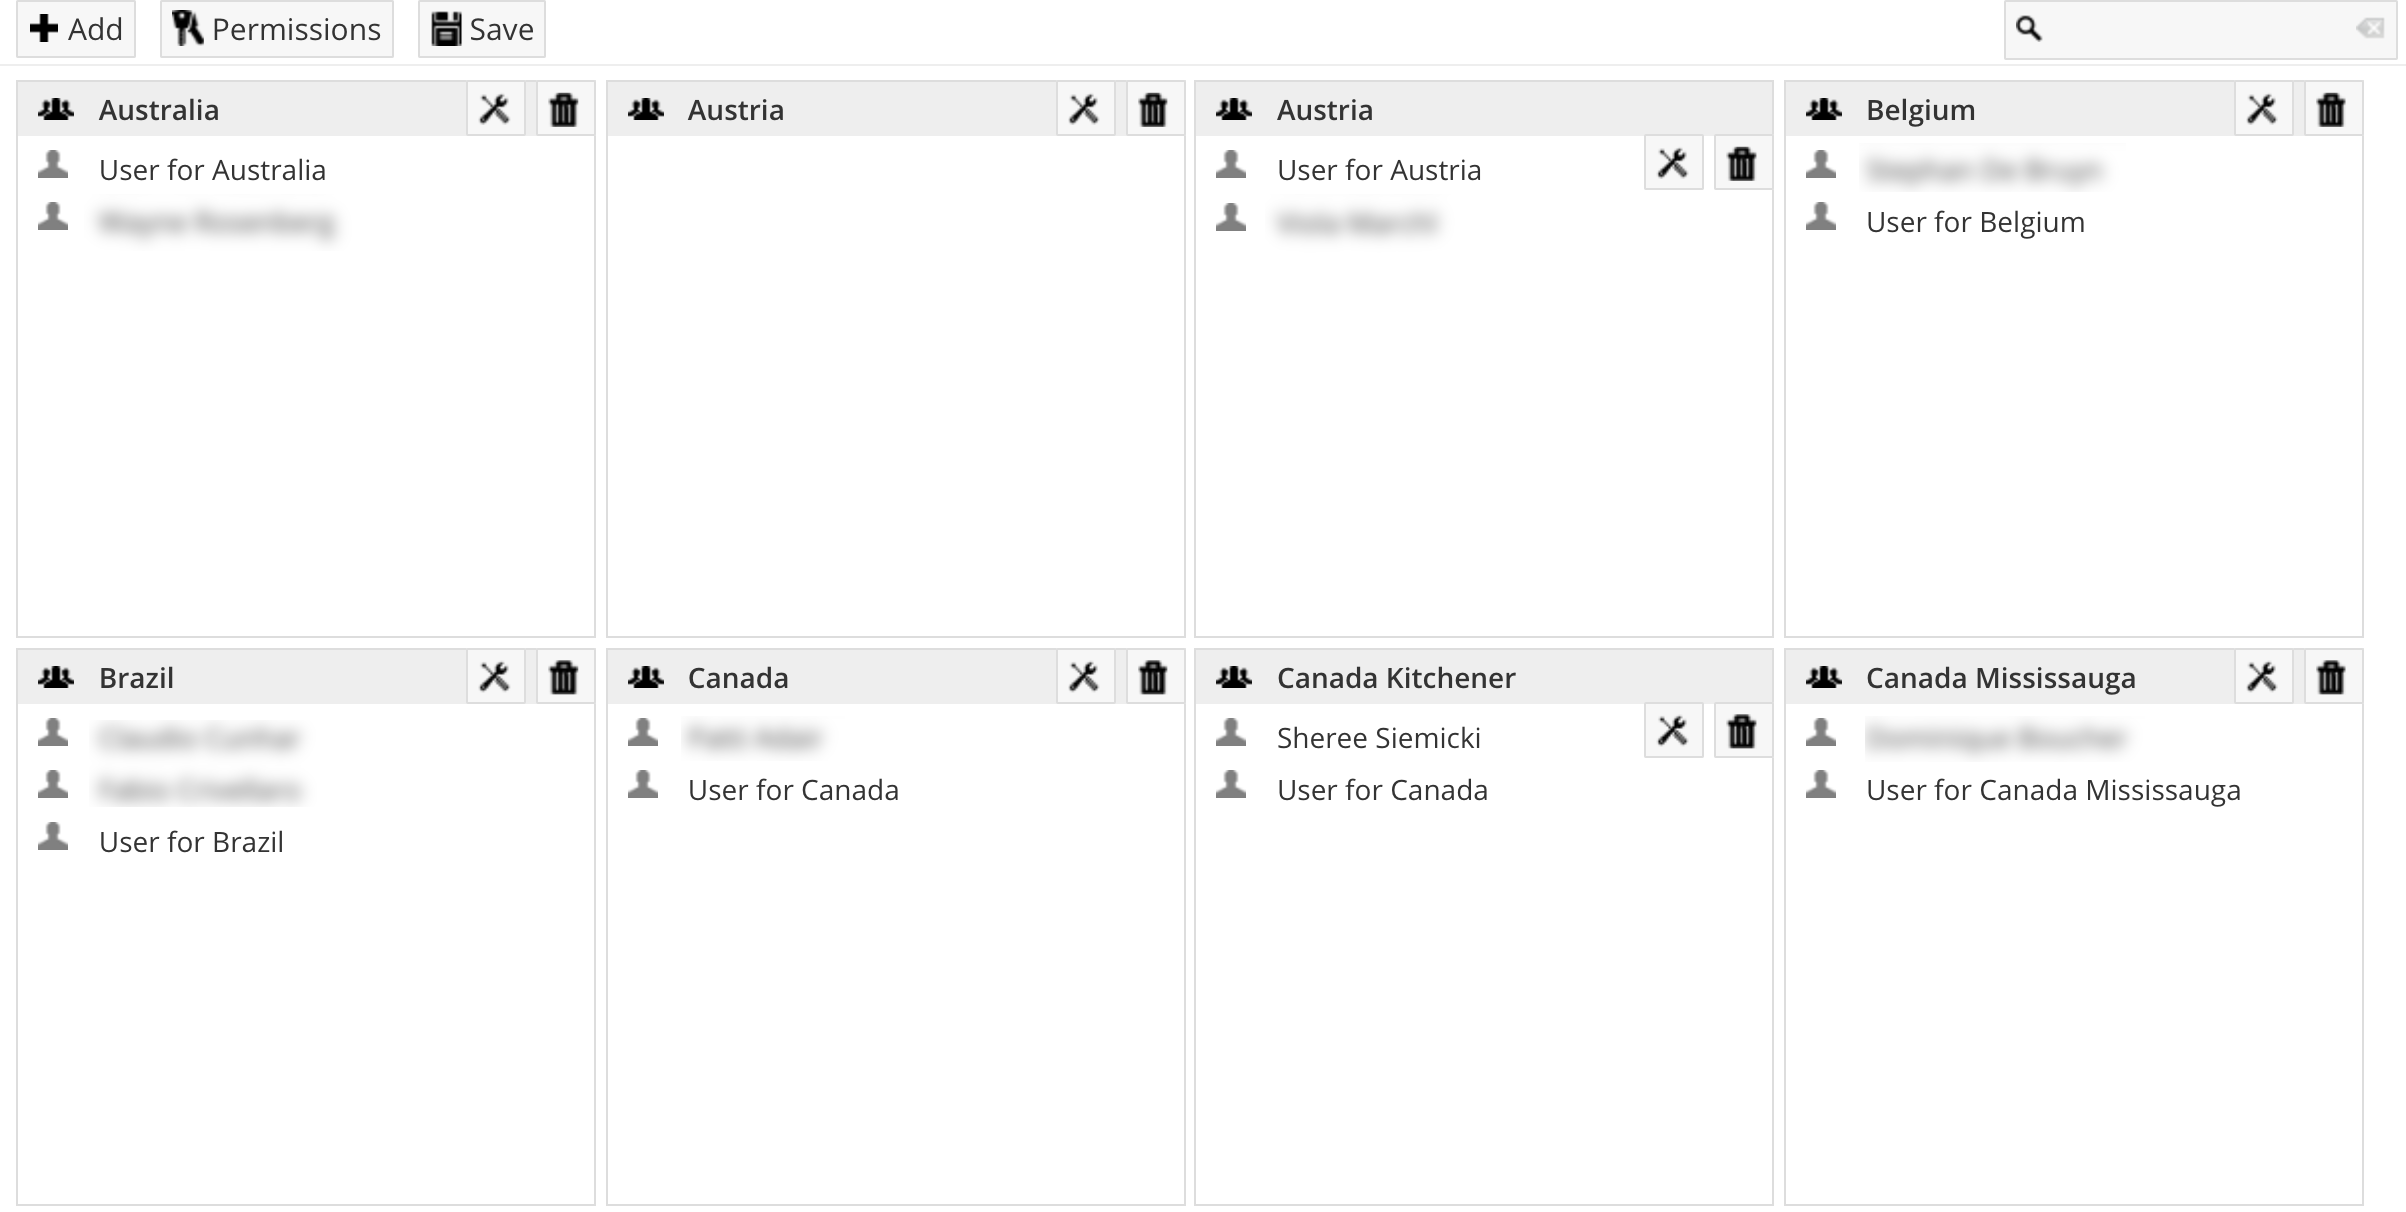
Furthermore, user groups now have their own settings page, where you can now override the example publication user on a per-group basis.
3.3 Menu: Users
The user list has also been improved in a similar way — the columns to be displayed can be selected and certain bulk-actions can be performed for several users at once.
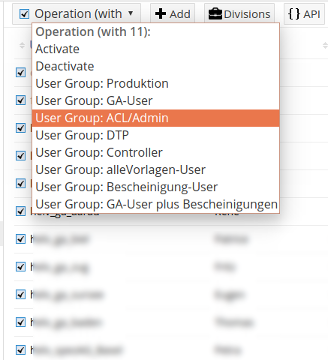
3.3.1 Create new user
When a user is created by a group administrator, their permissions or restrictions are now automatically copied to the new user.
Bulk actions are available through the new hover menu where you can choose all, none or toggle the checkboxes.
![]()
3.4 Templates
3.4.1 Extended display of field names for administrators
To give administrators a better overview of template names and template group labels, you can separate the names and labels with the | character. The front part of the label is displayed to the users, the back part serves the administrator and is only displayed to him (same as has always been the case for element names).

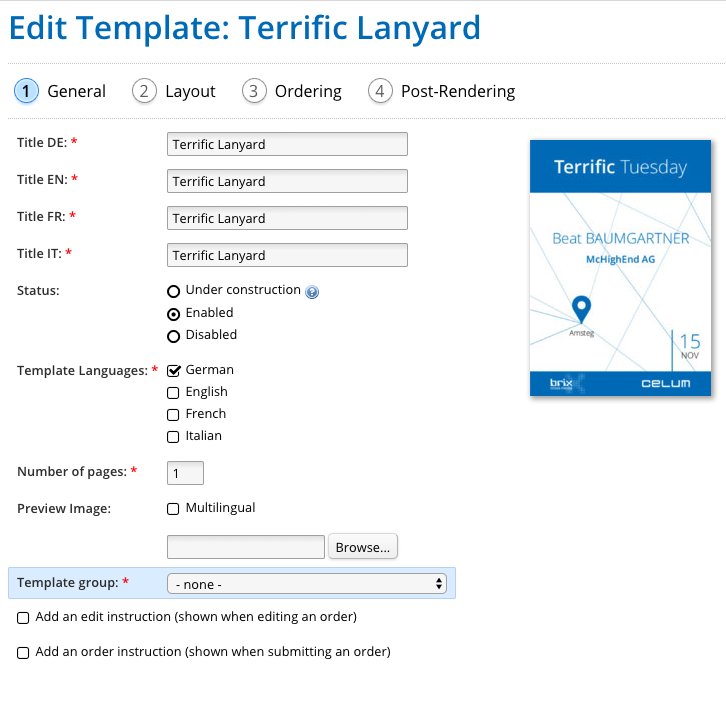
3.4.2 Selectable template group
The template group can now also be selected in step 1 "General" when editing a template, saving you a visit to the template groups page.
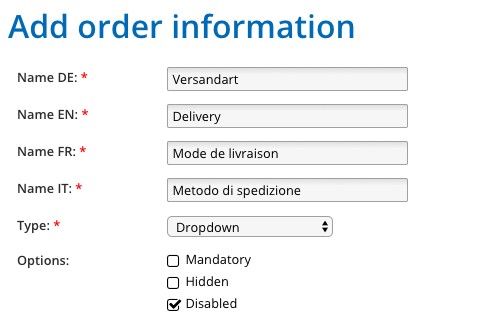
3.4.3 Display of order information without modification by the user
Individual fields for order information can be deactivated. This allows information from selection lists to be displayed without the user being able to change them.
3.4.4 Clone templates
The administrator can now also clone linked templates.
3.5 Statistic
3.5.1 Access of group administrators to the Statistics menu
Group administrators can also view the statistics depending on their permissions.
3.6 Further Optimizations
3.6.1 Elements — Editing the default values
Default values of elements can now be accessed directly in the list view through the 
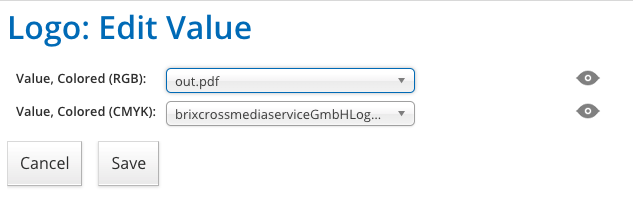
3.6.2 Create direct connections in element editing
When editing element values, direct value relations can be created directly from that view. Note that this is currently only available for 1-to-1 relations. Multidimensional relations still have to be edited in the regular relations dialog.

3.6.3 Assign rendering profiles to templates
Available render profiles can be assigned by the administrator in the template editing dialog.
4. Availability of Modul Updates
Updated modules are automatically made available to all customers with a corresponding update contract and all SaaS customers who have licensed the affected modules.
4.1 brix:papilio DAM Module compatible with Celum 5+
The brix:papilio DAM module is now compatible with CELUM 5+ and supports the infofield types.
4.2 Keyword Filter
Keyword filters can also be used via node referencing fields by prefixing the information field ID in front of the node ID, e.g. 42:1337 checks the infofield 42 (recursively) for the node 1337.
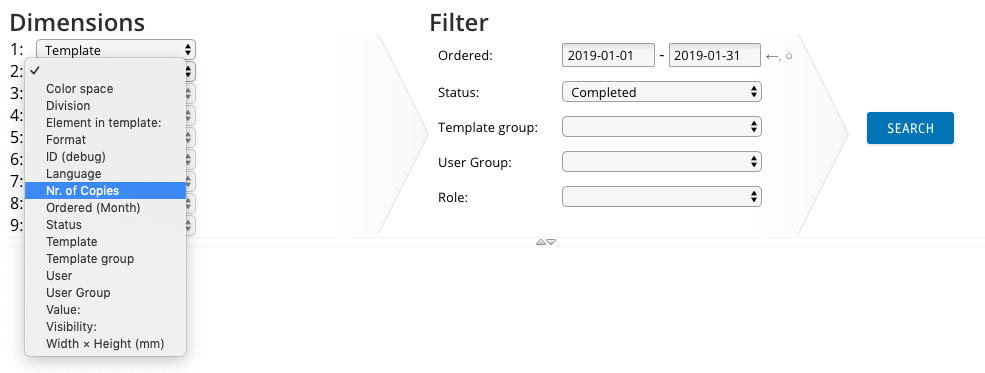
4.3 Pivot table extended to 9 dimensions
Up to 9 dimensions are now available when creating pivot tables.
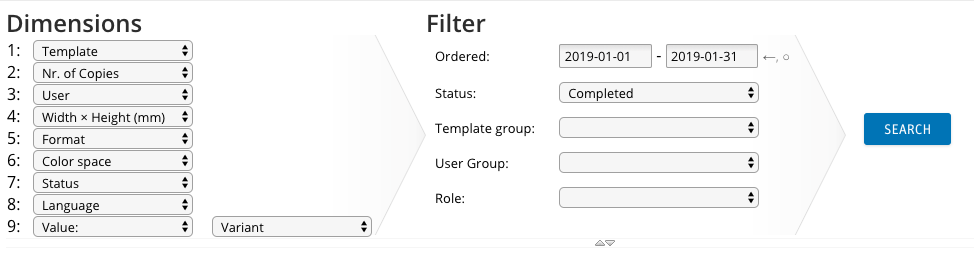
4.4 More dimension for statistical analysis
More properties can now be used as pivot dimensions.
4.5 Single Sign-on (SSO) with SAML
To avoid a user having to log on to every system repeatedly, it is possible to log on to brix:papilio with Single Sign-on (SSO with SAML 2.0). In addition to the usual SAML parameters, the import behaviour is also configurable, e.g. the parameters from SAML or the group membership can be transferred to the user.
5. Technical Improvements / Notes
5.1 brix:papilio Integration in CELUM DAM
The brix:papilio Integration in CELUM DAM allows users to trigger orders directly in CELUM DAM. The context menu "Order with W2P" in CELUM DAM opens the order dialog of Papilio, where the usual details for the order are entered.
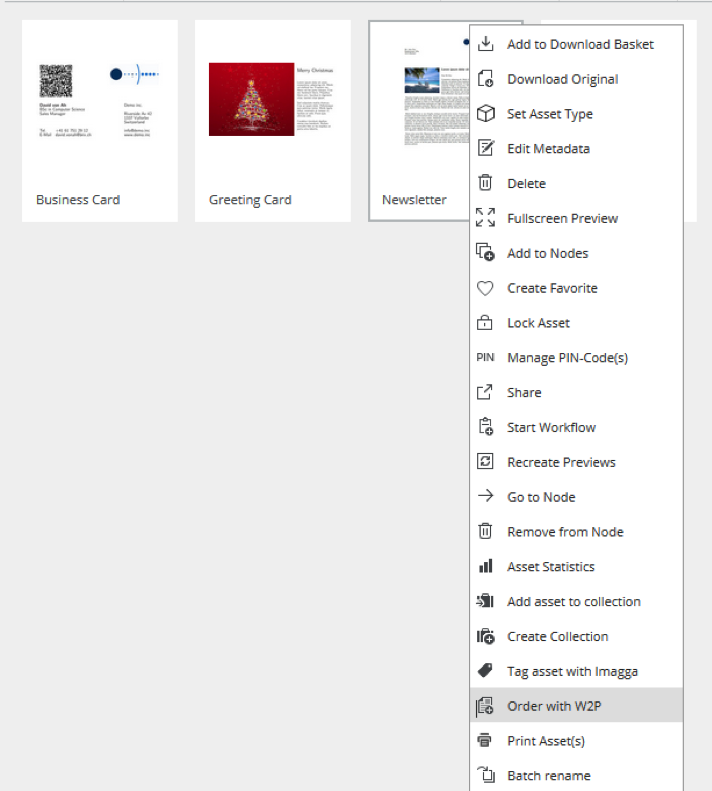
After sending the order, the finished document is ready for download in CELUM DAM. It is displayed directly in the inbox folder and has a relation to the template asset where the order has been triggered from.
5.2 Application
5.2.1 Max PDF size for emails to print service providers
Usually high-end PDF are not sent in the print operator notifications, as they would probably be too big. Now, you can configure a maximum size up to which the PDF will be attached to the mail. This is useful for simple orders, such as business cards.
5.2.2. Values for the printer can be stored directly in the PDF
Values from the order can be stored as keywords in the PDF, so the printer no longer has to log into the system to read such metadata, but can extract them directly from the PDF.
5.2.3 Individual bitmap and vector fonts
It is now possible to define individual bitmap and vector fonts. This allows the use of icons etc. as if they were regular text characters.
5.2.4 Reuse of order information
The PDF of already placed orders can be reused through a dedicated element when ordering another template.
5.2.5 Import text from external sources
Any text content (based on its ID) can be obtained from external sources and used in the orders. This eliminates the need to synchronize such data with brix:papilio. For example, in the case of address data, only the name (for selection by the user) must be stored in the system together with the user's ID. All other information (street, city, etc.) can be retrieved live from the external source.
5.2.6 Forward Orders
Forwarding of orders is now only possible within the user's own user group.
5.3 Configuration
5.3.1 Deactivate default delivery address
The default address for the delivery can be deactivated in the template editing section under orders.
5.4 Emails
5.4.1 Individual email header
It is now possible to configure an individual "header" for the emails.
5.4.2 Support email address
The support email address for error messages can be configured independently from the regular address.
5.4.3 Traceability of email messages
The recipient's email address is now stored separately (the user's email settings are subject to change).
© brix Solutions AG